


CONTINUATION: the Daisy Chain Stitch
- the bead you just went through is also a connecting leaf-bead of the next flower
- therefore, you will ***pick up only 5 beads (instead of 6 beads) - always an uneven number -
- and thread back through that single bead the two flowers have in common
- pick up one center bead and go back to the middle of the circle on the opposite side
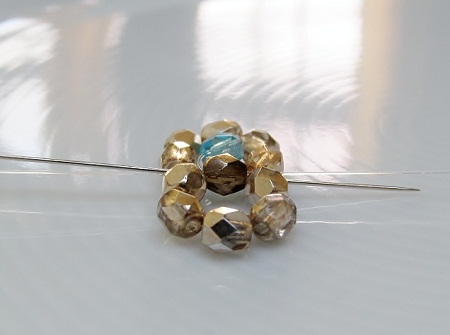
- check out the structure of the flower: it needs to have two beads on each side which do not connect with the preceding flower
- simply put the flower is made of: 1 connecting bead, 2 non connecting beads, 1 connecting bead and 2 non connecting beads
- thread through that single bead on the opposite side, respecting the parallel direction, so the holes of all the center beads are always facing in the same direction***
- repeat *** … ***
- when you have obtained the desired length, feel free to reinforce the structure and do another pass through the beads
- attach a clasp and enjoy your work
Note:
- the center bead does not necessarily need to have the same size as the leaf-beads, you could replace it by a bigger size, making it more noticeable
- the sides of the flower garland offer you another opportunity to be creative and may be embellished
- example: bracelet in embellished daisy chain with 16 seed beads size 11/0, of which 3 connect and a 6x6 mm central bead.
.jpg)
Thank you for choosing your beads @ http://dunebeads.com/en/czech-fire-polished-round-beads !
Do not forget: have fun, because practice makes perfect. See you soon!