RSS

Blog

TIPS and TRICKS for NEWBIES – a multi-strand gradient necklace - part 1

You have already made a couple of single strand necklaces and thus are comfortable with attaching a clasp. With just a little extra element you will already be able to make a multi-strand gradient necklace. A gradient necklace fits as well with clothing with a high neckline as with strapless and therefore can be worn both in summer and in winter.

A not overlapping or gradient multi-strand design:

You have the choice between strands that overlap or strands that do not. By overlapping strands all the strands have exactly the same length. When not overlapping each strand is always slightly longer than the previous one and thus forms a cascade. Depending the size of the beads, some mathematical calculations may be required.

multi-strand gradient necklace

To attach three or more strands to a clasp, you may insert the following element between the strands and the clasp:

  • either a 5mm jump ring
    • advantage: easy to realize – disadvantage: you will lose some length when attaching as you fasten the strands one next to the other
  • or a jump ring and a multi-strand end bar such as our tube-shaped one with 3 rings, 9x13 mm
    • advantage: this method respects the calculated distances – disadvantage: you should pay extra attention to the order when attaching the wires

jump ring between clasp and multi-strand end bar

The hardest part with non-overlapping multi-strands is:

  • not to distort the jump ring
  • the consistency between the strands: each strand has to be somewhat longer, and this difference should be distributed evenly over the strand.

Calculating of the length of the different strands of a cascade necklace:

  • for smaller beads, the difference between each strand should amount to 2,5 cm, for mid-sized beads it will be 3,1 cm and for big beads that will become 3,75 cm
  • with extra large beads you will need even more space (sometimes even up to 6 cm), while with 3 mm beads on the other hand you foresee less space (2,2 cm)
  • if you use both small and large beads, always keep into account the size of the largest bead you will use to determine the distance between the strands
  • example, with medium-sided beads: if strand 1 = 40 cm - than strand 2 = 43,1 cm - and strand 3 = 46,2 cm

Advice:

  • integrate rondelle beads or spacers in your design so that it is easier to create the calculated length
  • lay out a unit of your design, measure it and evaluate if it will permit you to get the required length
  • if your design ends in a big bead, add some seed beads

calculating length strands multi-strand gradient necklace

SEE - part 2

TIPS and TRICKS for NEWBIES – a multi-strand gradient necklace - part 2

A MULTI-STRAND GRADIENT NECKLACE - INSTRUCTIONS

Supplies for a necklace with three strands:

  • beads: calculate the quantity as indicated above
  • a toggle clasp
  • 2 jump rings
  • 2 three multi-strand connectors or end bars
  • 6 crimp tubes or beads
  • 3 lengths of 60 cm beading wire

Tools:

  • a beading board with tunnels for multiple strands or a soft towel in a neutral color
  • note: generally the tunnels of a beading board have a difference in distance of 3,1 cm
  • pliers: two chain-nose pliers or a bent chain-nose and a chain-nose pliers, a crimping pliers and a flush cutter

gradient necklace 3 strands with end bar

Instructions:

  • cut off three wires with your flush cutter
  • arrange your medium sided beads on a beading board with tunnels for multiple strands or do the calculation given above for other sized beads
  • ensure a symmetrical distribution of the beads over each strand
  • check that the pattern shifts evenly over the three strands
  • attach a beading wire to the divider with a crimp bead or tube
  • thread the beading pattern and attach the other end with a crimp bead or tube to the second end bar
  • note: the longest strand is to be attached to the lowest ring of the end bar, the shortest strand to the top hole
  • repeat and attach the other two strands in the same way

opening and closing jump ring

  • with two pliers, open a jump ring
  • slide the eyelet of the claps en the ring on the other side of the end bar in the open jump ring and close the jump ring
  • repeat on the other side.

Note: it is really helpful to know how to work with jump rings since it gives extra mobility to your strands, moreover it allows you not only to lower the multi-strands part, but also to attach charms, pendants, etc. Use in the latter case larger jump rings.

cascading multi-strand necklace

One step further:

  • if you want to maintain clearly the distance between the strands you could incorporate a multi-row spacer or separator at shoulder height on both sides of the necklace.
  • if you work with tiny beads you could combine the technique of overlapping and non-overlapping strands. In which case you make a few strands of the same length and attach them one next to the other on one ring of the end bar: in other words, you consider the overlapping together as a single strand ... then again a few similar strands, but all slightly longer than the previous ones ... so you do not overlap and you attach them to the next ring of the end bar, and so on.

Technique - Attaching a jump ring - http://dunebeads.com/en/tips-and-tricks-for-newbies-small-jump-rings-big-worries-the-technique

Enjoy your creation and .. buy your findings @ https://dunebeads.com/en/metal-jewelry-findings !

Did you =Like= this article ? Have fun. See you soon!

Tips and Tricks for NEWBIES - multi-strand necklace with visible wire - part 1

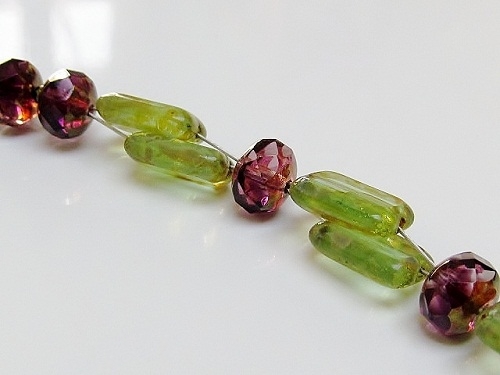
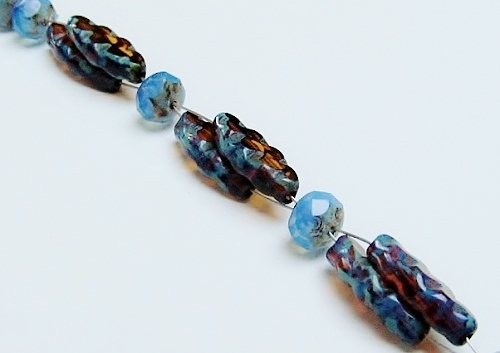
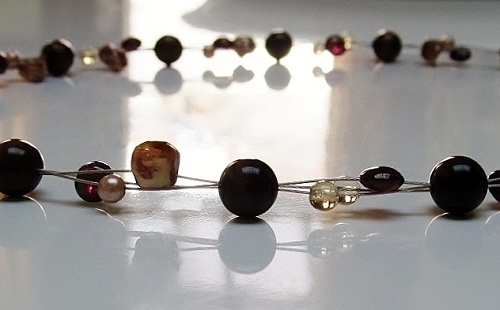
In this necklace the beading wires remain visible and are part of the design. You could also opt for colored wire and work with two or even more threads.

multi-strand necklace with visible wire

The hardest part:

  • attach the wires to the toggle
  • evaluate the tension in the wires and keep the wires parallel.

MULTI-STRAND NECKLACE WITH TWO VISIBLE WIRES:

For starters:

  • check that the holes of your beads are large enough to thread two wires.

What you need:

  • large or medium sized beads
  • a toggle clasp
  • 2 crimp tubes or crimp beads
  • 2 times 70 cm cabled wire

Supplies:

  • chain-nose pliers, flush cutters and optionally crimping pliers
  • bead board or a soft towel in a neutral color

Instructions:

  • with your flush cutter, cut off two beading wires
  • attach your clasp and please take your time to do so
  • pull the two cabled wires through an end bead, a crimp tube, the eye of the toggle clasp and back through the crimp tube and the bead
  • make sure the wires are parallel and do not intersect
  • squeeze the crimp tube and cut the excess wire with the flush cutter

attach two wires to toggle clasp

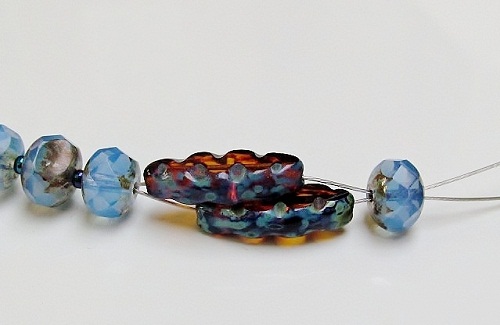
  • stringing further: you will alternate the thread use each time – that is, two times one bead on one wire and one bead over two wires, two times one bead over one wire and one bead over two wires ...
  • in other words: the wires individually and the wires together, the wires individually and the wires together …
  • check to see if your wires are still parallel and maintain the chosen beading pattern

beading pattern

  • make sure you push your beads far enough so that there is some tension, but not so tight that your work has no flexibility
  • give your work symmetry: the beads where the wires converge should be equidistant

beads where wires converge should be equidistant

  • check the length of the necklace and finish by attaching the second part of the clasp: go with both wires through the end bead, a crimp tube, the eye of the toggle clasp and back through the crimp tube and the end bead
  • verify if the wires are neatly side by side and squeeze the crimp tube
  • cut off the excess wire

multi-strand necklace with 2 visible wires

SEE - part 2

Tips and Tricks for NEWBIES - multi-strand necklace with visible wire - part 2

MULTI-STRAND NECKLACE WITH THREE VISIBLE WIRES:

Starting the three wire version:

  • before starting: make sure you actually get three wires through the bead where the wires converge
  • moreover, the crimp tubes need to be significantly larger because you will thread twice, three wires through it – you may need chain-nose pliers to pull the wires through the crimp beads or crimp tubes
  • string pattern: string each time a single bead on each of the three wires and one bead on the three wires together
  • in other words: three separate wires, wires together, three separate wires, wires together …

multi-strand necklace with 3 visible wires

  • you could of course replace the large or medium-sized beads by several small beads ... as long as you get the wires through them.

Enjoy your creation ... and buy your beads @ https://dunebeads.com/en/our-beads !

Did you =Like= this article ? Have fun. See you soon!

January's consequences and the TOP 10 Pantone colors 2015

This article appears quite late in the month
due to those controlling affairs called
stock management and accountancy.
With the monthly arrival of new products
comes also a huge stock to process …
so my apologies.

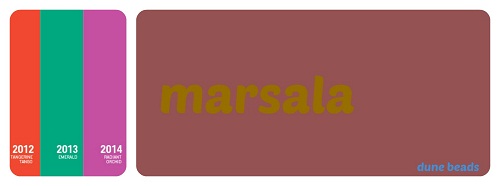
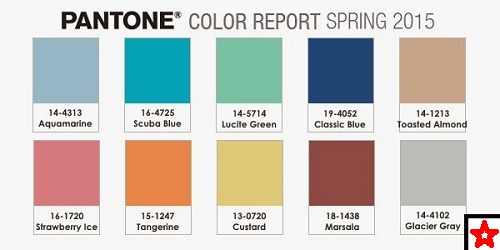
The new spring-summer colors are out there and
a deep muted wine red, called marsala or
Pantone 18-1438, is the main color for 2015.
In general, all the new colors have a muted feeling
about them, even the bright shades.

Marsala opens the spectrum of warm colors, which are:

  • toasted almond, a neutral sandy beige
  • tangerine, a muted orange, warm and inviting
  • strawberry ice, a warm soft pink on the brink of cool

On the other side of the spectrum are the cool colors:

  • aquamarine, airy and dreamy
  • scuba blue, a more bright Mediterranean blue
  • classic blue, a strong marine blue
  • lucite green, an aqua green or light turquoise with a retro touch
  • custard, a greenish yellow
  • glacier gray, a neutral soft bluish gray

To conclude,

  • the spring color scheme of 2015 is mainly cool and rather muted
  • the spring-summer collection contains two strong colors: Marsala and classic blue
  • at weddings we will be wearing lots of strawberry ice and aquamarine colors.

Enjoy your creation ... and buy your beads @ https://dunebeads.com/en/our-beads !

Did you =Like= this article ? Have fun. See you soon!

TIPS and TRICKS for NEWBIES - stringing beads on one wire

You have installed yourself and you really feel like giving it a go ?

To begin with, we recommend the following:

  • determine the length of your jewelry piece by using an existing necklace or bracelet, hereby keeping in mind the length of the clasp
  • choose beads of different sizes, shapes and/or colors
  • in need of help to choose your colors - on https://color.adobe.com/create/color-wheel/ you will find a color wheel and of course you may always visit our blog.

Supplies:

  • bead board or a soft towel in a neutral color
  • for a necklace: choose a variety of beads with an average size of 8, 10 or 12 mm
  • cabled wire - total length required: necklace length plus 30 cm
  • a clasp (toggle or lobster claw)
  • two crimp beads
  • chain-nose pliers and flush cutter

Instructions:

  • with your flush cutter cut off the required length of wire
  • arrange your beads on the bead board until you get the desired effect
  • unsure of yourself: start in the middle and build up your design from there
  • whether you opt for symmetry or asymmetry, ensure a balanced structure
  • for an asymmetrical effect, created by the size of the beads, you also have to take into account the weight
  • satisfied with your work - thread the beads on your cabled wire
  • if you use a central point or a pendant, make sure that both sides are equally long
  • with an asymmetrical design: hold up the necklace at eye level and look whether it is as you wish
  • check the total length, taking into account the length of the chosen clasp
  • attach the clasp

How to attach a toggle or lobster clasp:

  • pull the cabled wire through an end bead, a crimp bead and finally through the clasp
  • pull through till about 15 cm from the end
  • thread the wire end back through the crimp bead and the end bead
  • make sure the wires are parallel and do not intersect, because they want to do just that
  • pull so that the crimp falls against the clasp, but make sure there is 2 to 3 mm space left so that the clasp can move freely
  • squeeze the crimp bead flat with the chain-nose pliers
  • hold the wire with your creation in your hand
  • cut the excess wire with the flush cutter, but check out first that you cut the right wire
  • repeat on the other side

The next level - see animation:

http://www.youtube.com/watch?v=kDFkBqFOdp8&rel=0

Thank you for choosing your beads and findings @ https://dunebeads.com/en/shop !

Have fun ... see you soon !

Bead stringing basics: setting up

You will be amazed how much better your jewelry will look if you use the right material and … the right tools for the right job.

For starters you will need :

  • Round-nose pliers, which have rounded tips and are used to curl wire or make loops
  • Flat-nose pliers, a basic gripping tool – or chain-nose pliers, which are more versatile
  • Wire cutters, which will not only cut the wire, but also the headpins you use for making earrings
  • Some glue, jeweler's glue of any brand will do
  • Scissors, to cut thread

Now you are on your way to choose your beads:

For color inspiration, see http://dunebeads.com/en/color-advise-cool-tones and http://dunebeads.com/en/color-advise-warm-tones

And do not forget your findings:

The findings are those little elements that connect beads together. To start you will need French hook ear wires, jump rings, headpins, crimp beads and lobster claws or toggles.

Take them in the best quality you can afford and think of the clasp as a pendant or a fancy bead. Most of the basic stringing methods will permit you to show off the beauty of the clasp, so take advantage of it.

In the next step you will choose your stringing material and take into account weight and size. The size of the beads and its material will guide your wire choices:

  • 4 to 6 mm beads: nylon thread will do
  • 8 mm and up: cabled wire, which is a nylon coated beading wire, from brand such as Flex-rite, Beadalon, Accuflex or Softflex. We recommend that you take a small roll of medium sized wire to start with.
  • If you love freshwater cultured pearls, use Griffin cord, as all other material will damage your pearls in the long term.

Take into account your targeted customer when choosing stringing material:

  • For exclusive jewelry, choose 49 strands cabled wire, medium for starters, as its high flexibility will give you just that extra quality edge.
  • For youngsters, kids and those who have joint problems there is stretchy jewelry cord in all sizes and colors.

Add your personal touch:

The world around you is your source of inspiration and your view of it makes it unique. By combining different materials and colors, you will develop a very personal style. You may also limit your style by creating only one type of jewelry, such as bracelets, or by using one type of technique, like macramé.

To give you some ideas:

  • for a bohemian style combine leather with beads in a multi-strand design,
  • for a vintage look combine pastel colors and/or add silk and lace to pearls
  • … and for a sporty look, start with the colors of your local sports club.

And finally, fix your budget and visit http://dunebeads.com/en/ !

Have fun ... see you soon !

The perfect fit for your bracelet

Making or buying the right size bracelet seems not always an easy task whether you choose for a bead, link or a bangle type bracelet. Some basic information will help you on your way.

Measuring up:

  • Use a flexible tape measure or a piece of string + pen and paper
  • Measure up your wrist just beneath the wrist bone
  • Write it down and add some “extra length” for good measure

How to determine the extra length?

The length is partly determined by the width of the bracelet and partly by your preference. The wider the bracelet the more extra length you need to be comfortable.

  • For a snug fit (like a wristwatch) : add 1 cm tot 1,50 cm
  • For a comfortable fit: add 1,75 tot 2,5 cm
  • For a loose fit: add 3 cm

Advice: do not choose a snug fit for a wide bracelet

Size information for ready made bracelets:

Standard Women     Sizes bracelet      Standard Men      Sizes Wrist (loose to snug)

Small                         17 cm                                                 14 – 16 cm
Medium                     18 – 20 cm            Small                     15 – 18,5 cm
Large                         21 cm                   Medium                 18 – 19,5 cm
Extra large                 22 cm                   Large                     19 – 20,5 cm
                                  23 cm                   Extra large             20 – 21,5 cm

 Find your perfect fit @ https://dunebeads.com/en/jewelry-and-gifts !

Allergy-free metals and not so precious precious ones.

Silver:

As can be seen from the previous articles on allergies and metals it is not so much the claimed metal that causes allergy problems, but what is in the 'hidden' alloy or hardener. The same applies to silver and gold.

Certainly what allergy and discoloration is concerned, the difference between sterling silver and fine silver is of the utmost interest. 925 sterling silver is for about 7.5% alloyed with copper. Pure copper will not cause any problems, but other metals are often added. Moreover, both copper and silver oxidize and a silver alloy should be cleaned regularly.

These problems do not occur with fine silver which contains 99.9% pure silver and therefore does not oxidize. For those who have problems with sterling silver jewelry, there is rhodium or palladium coated silver on the market. That protective layer, which is subject to wear, ensures that the silver does not come in contact with your skin.

PS: when the protective layer disappears, you could put a layer of transparent nail polish over it.

Gold:

The story repeats itself with gold. It is the alloy which creates problems. To change the color and/or make gold cheaper silver, copper and nickel are added.

The answer to the question of whether gold is allergy-free can be found in its karats. 24 karat yellow gold is composed of 99.9% gold and thus will not cause any problems. 10 KT to 22 KT gold are but gold alloys to which gold, silver and copper are added and so all depending on your sensitivity, they can cause skin reactions.

The so attractive rose gold contains up to 25% copper, which is not always nickel-free, and the sought-after white gold often also contains nickel in addition to palladium to create the right white golden shade.

Allergy-free precious metals - niobium and titanium:

Niobium is a shiny white metal with a bluish sheen. It is not alloyed with other metals to make jewelry and as a consequence it is corrosion resistant and nickel free. Additionally, the niobium color can be changed through an anodizing treatment, without transforming its composition, making it available in many attractive colors.

Just like niobium, titanium is not an alloy, but a nickel-free element that can be anodized, thus offering the same advantages.

PS: attention, the benefits will be lost when you buy silver or gold-plated versions.

Enjoy shopping @ https://dunebeads.com/en/metal-jewelry-findings ... and have a great day ! 

Metals and skin reactions

Not all skin reactions are considered allergic reactions. Most skin discolorations, caused by contact of metal with perspiration and skin, are not seen as allergies, but as a mild reaction of the immune system. When having an allergy one gets itching, redness, swelling, etc..

Nickel & surgical steel - hardener & alloy:

Nickel is an affordable metal that is often used to harden soft metals and to give a silvery luster to the finishings. It is usually found in inexpensive components and jewelry. If you have a sensitive skin, stay away from it. You will carry a nickel allergy with you your whole life, so ask for nickel-free quality products.

Despite the fact that surgical stainless steel or type 316 steel contains about 10 to 14 % nickel, in theory, it causes no allergy to most people. Theoretically, the chemical composition should ensure that no nickel is released and as a consequence this might be a good option for sensitive skins.

Copper:

Pure copper rarely causes allergies, but because it is a soft metal, it is usually hardened and mixed with other metals. An allergy when wearing copper is often caused by a nickel element. Consequently, it is important to purchase nickel-free copper.

Copper does not react to water, but it does to oxygen, thus creating a green patina or verdigris that may stain the skin. An anti-tarnishing layer is certainly an advantage not to be despised.

Copper alloys - brass, bronze and pewter:

Copper is not only a component of brass and bronze, but can also be found in silver and gold alloys.

Brass is a mixture of copper and zinc, bronze is made of a lot of copper and a little tin, while tin alloy is essentially made of a lot of tin and a little copper (and in a minor extent, a number of other, non-allergic, metals).

In principle, none of these alloys contain nickel and as a consequence are allergy-free. Ask for good quality and prevent allergies.

Beware: German silver, alpaca or nickel silver is a copper alloy containing both zinc and nickel and is therefore not recommended.

Buy your products with confidence @ https://dunebeads.com/en/metal-jewelry-findings !

Did you = Like = this article ?  Have a great day ... see you later !